Porto Cotton Tunic - Free Crochet Pattern
/If you read my post about Cottons then you know Lion Brand 24/7 Cotton made the top 5. I am so excited to have teamed up with them to bring you the Porto Tunic which is the perfect beach cover up. You can follow the free pattern below and get the kit here. And thank you so much Lion Brand for providing the yarn for this project!
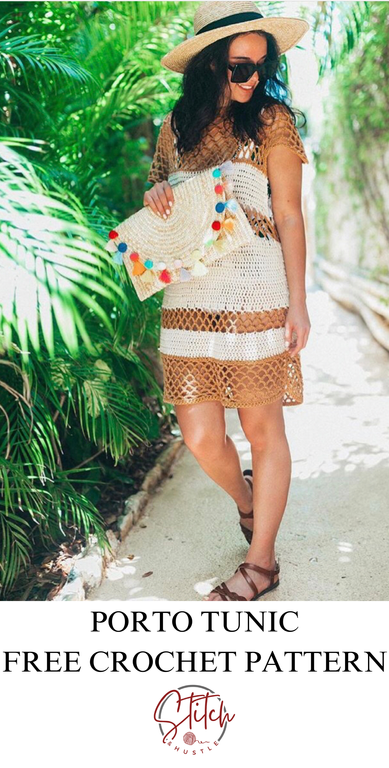
This is one of my favorite designs. You can truly customize it to make it your own. Follow the instructions for a perfect Tee or add a few rows for a longer Tunic. Personally, I added even more rows and it is the perfect swimsuit cover up for the beach. I love how this one pattern is so versatile you can make it so many ways. And you can read about the design process for this super fun top here.


The instructions are written for size Extra Small (Sizes Small, Medium, Large, 1X/2Xin parentheses). If you would like a printable pdf of this pattern that includes stitch chart and schematics, you can buy one here or get the kit from Lion Brand.
GAUGE: 12 dc x 6 dc rows = 4” / 4 ch 5 groups x 7 rows in Net = 4”
Finished Measurements
Bust: 32 (36, 44, 50, 56)”
Supply List:
Lion Brand 24/7 Cotton
Main Color 2 (2, 3, 3, 4) Skeins
Contrast Color 2 (2, 3, 3, 4) Skeins
Crochet Hook Size I-9 / 5.5 mm
Tapestry needle to weave ends
Tape Measure
Fasteners or safety pins
Stitches Used / Abbreviations:
fhdc – foundation half double crochet
ch – chain loop
sc – single crochet
hdc – half double crochet
dc – double crochet
sl st – slip stitch

Make two identical panels:
MAIN COLOR:
Row 1: Fhdc x 45 (54, 66, 75, 84) turn.
Row 2: Ch 1 (does not count as a stitch), sc in first fhdc, * Ch 5, skip 2 fhdc, sc in next fhdc *, repeat * to * across until 2 fhdc remain then ch 2, end with dc in last fhdc, turn. 15 (18, 21, 24, 27) ch 5 groups.
Row 3: Ch 1 (does NOT act as a stitch), sc in last dc of previous row, * Ch 5, sc into next ch 5 group * repeat * to * across end with ch 2 then dc into sc of previous row start, turn. 15 (18, 21, 24, 27) ch 5 groups.
Rows 4 -8: Repeat Row 3.
Row 9: Ch 1 (does NOT act as a stitch), sc in last dc of previous row, * Ch 2, sc into 3 rd ch of next ch 5 group * repeat * to * across to end with ch 1 then dc into sc at beginning of previous row, turn.
Row 10: Ch 2 (acts as first hdc), 1 hdc in ch 1 sp, * hdc in sc, 2 hdc in ch 2 sp * repeat * to * across to end, hdc in last sc, turn total 45 (54, 66, 75, 84) hdc incl ch 2.

SWITCH TO CONTRAST COLOR:
Rows 11 - 16: Ch 2 (acts as first hdc), 44 (53, 65, 74, 83)x hdc across for total 45 (54, 66, 75, 84) hdc incl ch 2.
SWITCH TO MAIN COLOR:
Row 17: Ch 1 (does not count as a stitch), sc in first hdc, * Ch 5, skip 2 hdc, sc in next hdc *, repeat * to * across until 2 hdc remain then ch 2, end with dc in last hdc, turn. 15 (18, 21, 24, 27) ch 5 groups.
Rows 18-19: Repeat Row 3.
SWITCH TO CONTRAST COLOR:
Row 20: Ch 1 (does NOT act as a stitch), sc in last dc of previous row, * Ch 2, sc into 3 rd ch of next ch 5 group * repeat * to *across to end with ch 2 then dc into sc at beginning of previous row, turn.
Row 21: Ch 2 (acts as first dc), 1 dc in ch 1 sp, * dc in sc, 2 dc in ch 2 sp * repeat * to * across to end, dc in last sc, turn total 45 (54, 66, 75, 84) dc incl ch 2.
Rows 22- 26: Ch 2 (acts as first dc), 44 (53, 65, 74, 83)x dc across for total 45 (54, 66, 75, 84) dc incl ch 2.
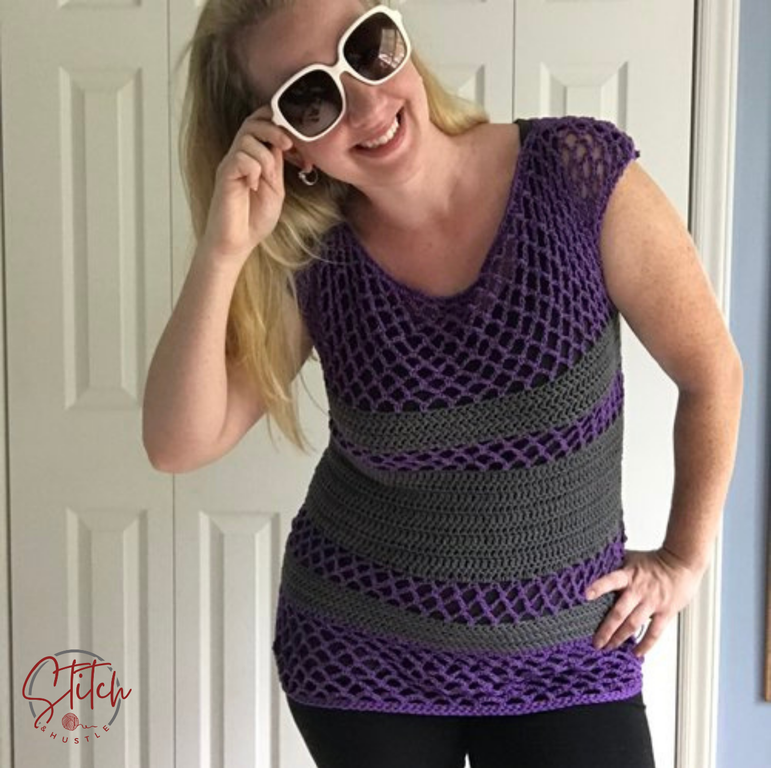
This is where you want to add rows for a longer garment. If you keep going from here and do not add rows it will look like the Blue & White Tee version above. If you add 2 rows here it will look like the Pink & Latte version above. if you add 4 rows it will look like the Gold & Ivory version. If you add 6 rows it will be like the Purple & Ivory version. So you can truly make this any length you want. I suggest following the pattern directly the first time to get an understanding of the dimensions. You may need more yarn depending on how many rows you add.
SWITCH TO MAIN COLOR:
Row 27: Ch 1 (does not count as a stitch), sc in first dc, * Ch 5, skip 2 dc, sc in next dc *, repeat * to * across until 2 dc remain then ch 2, end with dc in last hdc, turn. 15 (18, 21, 24, 27) ch 5 groups.
Rows 28-29: Repeat Row 3.
SWITCH TO CONTRAST COLOR:
Row 30: Ch 1 (does NOT act as a stitch), sc in last dc of previous row, * Ch 2, sc into 3 rd ch of next ch 5 group * repeat * to * across to end with ch 2 then dc into sc at beginning of previous row, turn.
Row 31: Ch 2 (acts as first hdc), 1 hdc in ch 1 sp, * hdc in sc, 2 hdc in ch 2 sp * repeat * to * across to end, hdc in last sc, turn total 45 (54, 66, 75, 84) hdc incl ch 2.
Rows 32 - 36: Ch 2 (acts as first hdc), 44 (53, 65, 74, 83)x hdc across for total 45 (54, 66, 75, 84) hdc incl ch 2.
Shaping arm and shoulder
SWITCH TO MAIN COLOR - Begin increase / shape arm / shoulders:
Row 1: Ch 1 (does not count as a stitch), sc in first hdc, * Ch 5, skip 2 hdc, sc in next hdc *, repeat * to * across until 2 hdc remain then ch 3, end with dc in last hdc, turn. 15 (18, 21, 24, 27) ch 5 groups.
Row 2: Ch 8, sc into ch 3, * Ch 5, sc into next ch 5 group * repeat * to * across then end with ch 5, dc into sc of previous row, turn. 16 (19, 22, 25, 28) ch 5 groups.
Row 3: Ch 8, sc into ch 5, * Ch 5, sc into next ch 5 group * repeat * to * across then end with ch 3, dc into third ch of ch 8 that started previous row, turn.
Rows 4 – 9 (9, 9, 11, 13): Repeat Rows 2 & 3, 3 (3, 3, 4, 5) times. 21, (24, 28, 33, 38) ch 5 groups.
Row 10 (10, 10, 12, 14): Ch 2 (does NOT act as a stitch), sc in ch 3 of previous row, * Ch 5, sc into next ch 5 group * repeat * to * across then end with ch 2, dc into third ch of ch 8 that started previous row, turn.
Row 11 (11, 11, 13, 15): Ch 1 (does NOT act as a stitch), sc in dc of previous row, * Ch 3, sc into 3 rd ch of next ch 5 group * repeat * to * across to end with ch 2 then dc into sc at beginning of previous row, turn.
Row 12 (12, 12, 14, 16): Ch 2 (acts as first hdc), 2 hdc in ch 2 sp, * hdc in sc, 3 hdc in ch 3 sp * repeat * to * across, then end with hdc in last sc.
Fasten off.
Repeat to make second Panel.
Once you have both front and back panels complete - Block your pieces. It is really important to block before assembly - especially to prevent puckering when you assemble the netting portions. Read more about blocking here.


ASSEMBLY
Marry your two panels and this will now be INSIDE OUT.
Using your stitch markers or fasteners, pin the panels together in these two places on each side:
> One at Row 35 on each side where you begin contrast color to create armholes
> One at the bottom Row 4 of the netting

Then, beginning at the bottom Row 4, connect the panels with sl st or whip stitch up the seam.
When you get to the top fastener, fasten off.
Measure about 10 – 10.5” from shoulder in and pin the 2 panels together.
Seam shoulders together using Mattress Stitch method or whip stitch from the outside in to the fasteners.
This creates the boat neck as you will see the fabric relax.
TURN RIGHT SIDE OUT – weave in all ends and pat yourself on the back because you just made the Porto Tunic!
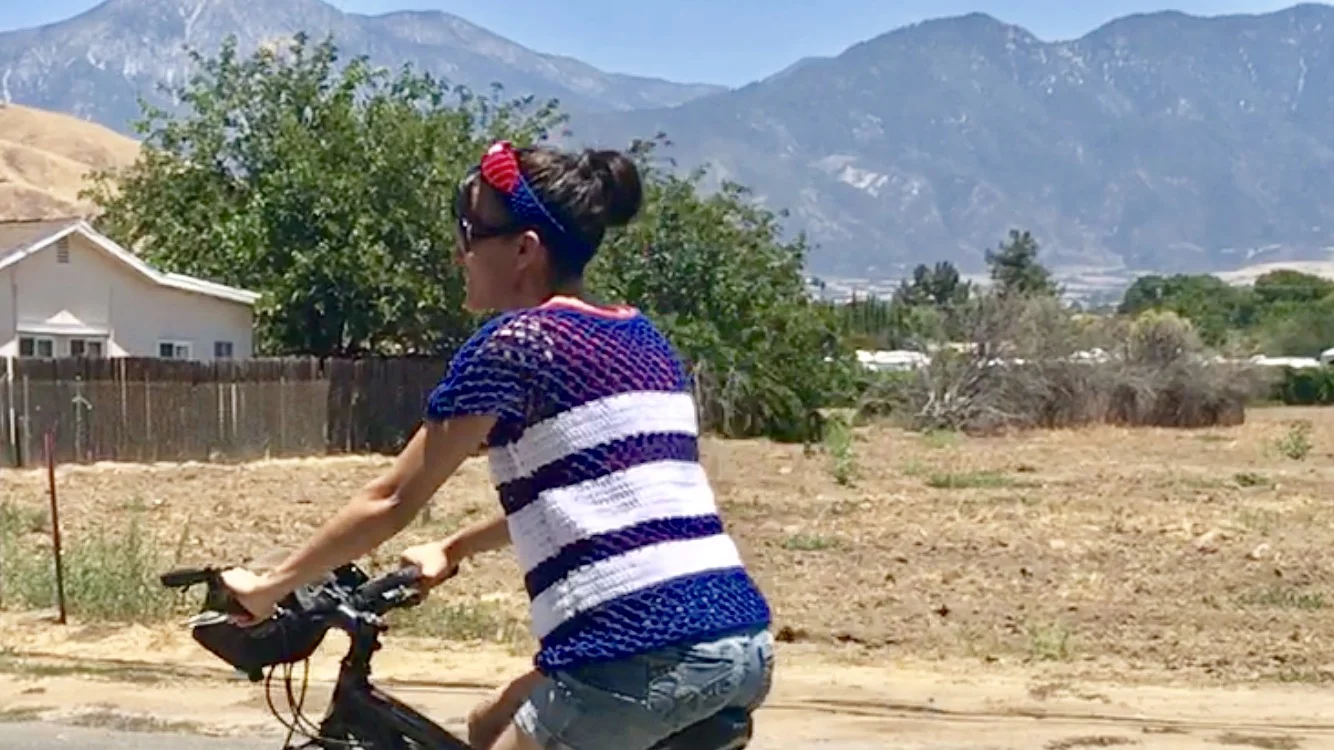
Ride Off Into The Sunset Wearing The Porto Tee
Don't forget you can buy the Kit from Lion Brand to make your Porto Tunic or you can download the pattern from my Etsy shop here.