Budget Friendly DIY Hat Displays

Budget Friendly DIY Hat Displays

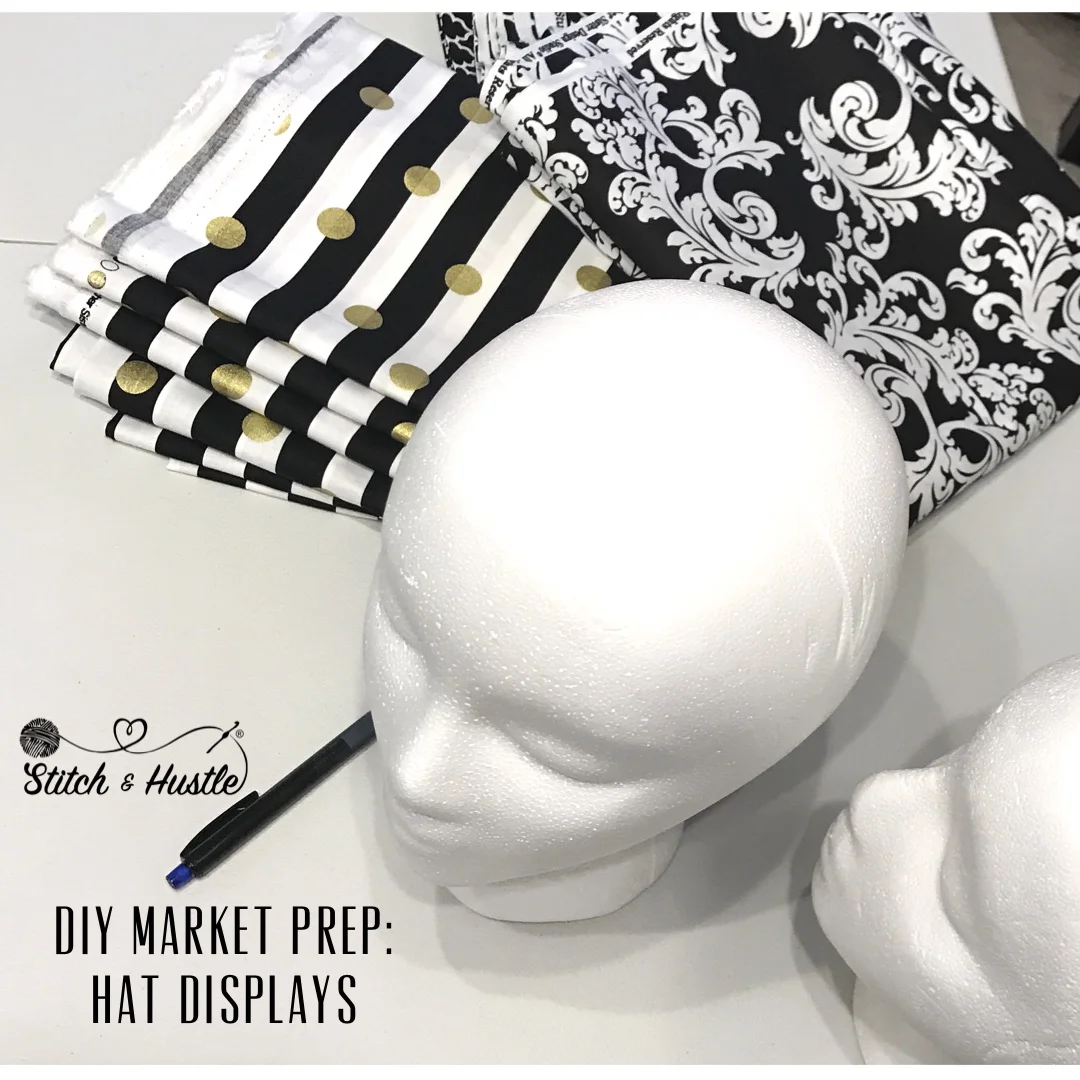
Market season may be different this year but prep is still essential! Get yourself ready for Market Season and Market Prep In Style With These DIY Hat Displays. Stay on brand and create a stylish display for under $10!

Read More

Influencer Marketing 101 For Your Maker Business

To follow up on my Brand Partnerships and Mama Knows posts, I wanted to go deeper into this world of Influencer Marketing.

Even without my marketing experience, as a blogger and a small business owner, I am quite familiar with the world of influencer marketing on both sides. Influencer marketing can and does work when it is authentic and real and done right. Anyone who knows me from my old days has heard me glob off a good rant or two about the down sides and the “false influencers”. They are real. But aside from that, true authentic influencer marketing can work not only for the influencer and their community but for brands as well. And, I am advocate of true, authentic influencer programs.

Having said that, without proper planning or execution, it can also go terribly wrong and damage a brand and cost them customers.  I recently had an experience of Influencer Marketing gone very wrong and it made me want to share some how-to tips and turn it into a positive to help YOU, the Stitch & Hustle community. Let this experience help you guys set up for a WIN!

planning.png

I’ve also invited Alissa Trumbull, a good friend of mine who works in social media marketing, to share some tips to help YOU plan and execute an effective and successful influencer marketing program. I have known Alissa for a many years and she is a voice I trust on this topic. As someone who supports and builds small brands (and big ones) I am honored she is taking some time to share insights with us. Also Alissa is truly one of favorite human beings on the planet. Together we've come up with Influencer Marketing 101 for Makers! So let's dive in…

What exactly IS influencer marketing?

Simply put, influencer marketing is when you utilize niche, community, (or celebrity influencers in some instances) to promote your product or service. Influencer campaigns are a wonderful tool, if utilized correctly, as they get other people talking about your brand.

Who is an influencer?

An influencer is anyone who impacts the lives of your target audience and has sway in your audience’s decision-making. Using the crochet and knit world as an example, this could be someone like Stephanie from All About Ami who always has new projects or great finds to share or Jess from Make And Do Crew who is always introducing us to new yarns and ideas. Remember that the best influencers don’t have to have the highest follower count. You need to look at the purpose and goals of your brand and the campaign to determine who is the right fit.

Take Time. Make It Personal.

Take Time. Make It Personal.

How to Create an Influencer Campaign:

  1. Figure out your end goal and working budget.
    Do you want to drive sales, increase brand awareness, or something else?
    Does your budget include compensation or just product or both or something else?
  2. Select your influencers.

    Ask yourself: "Which influencers speak to my audience?" Think about who your audience will be most receptive to and target influencers in that demographic. Is it stay-at-home-moms? Craft pros? That one music star everyone’s talking about?

    You are not confined to only niche or only celebrity influencers for a campaign. Often creating a tiered set of influencers can be beneficial, as long as the influencers you select are authentic to your audience and you build an authentic relationship between your brand and them.
  3. Do your research.

    Find out more about the people you’ve selected, their audiences, and expected payment. You have to take the time to dive deep and see the value and make sure it is the right fit. Some of the best influencers may have a small but active and dedicated following.

    Make sure the influencers you consider adhere to the FTC Endorsement Guides.

    Pare down your list to one that is manageable for your budget (whether that is in actual cash, event tickets, or product giveaways, etc.) and provides a good fit to meet your goals.
  4. Start reaching out!

    Get in touch with the people you really want to participate first. Don’t ask everyone at once. This helps ensure that you are not promising too much. If you only have the ability to send ten (10) samples, email 8-10 people. You may not know the response, but should always expect that everyone will say yes. Sending more offers and emails than you can deliver sets yourself up for failure and damage relationships before you can even build them.

    The spray and pray model for building an influencer community – and yes, this is a community you are building – is not effective and can end up with people having a negative taste about your brand and you feeling overwhelmed. Create lists and tiers and go from there. It may take more time but will set you up for the win!
     
  5. Be enthusiastic AND gracious.

    You are asking people to enter into a business partnership with you to test out your product or speak kindly of your brand. Approach potential influencers as if they are doing you a favor (because they are).

    Share the details and goals of your campaign and let your enthusiasm come across. You WANT to get people excited. Your enthusiasm can build the interest you want, and those whom you reach out to will respond positively to your energy and good vibes.
     
  6. Be clear in your ask!

    Let each person know what you would like from them and what you are prepared to offer. Your offer does not need to be the same for each person. Perhaps you create different offers for each influencer tier. Again, go back to the research and what is a good fit.
  7. Set deadlines.

    In your initial email, be clear on the dates of your campaign (when the campaign is taking place, when you need content completed by, etc.) and ask for a response by a certain date. This reply by date is very important, as it sets up a clear expectation that if they get back to you after this deadline, you may not be able to accommodate them for this specific campaign.

  8. Be prepared to say no.

    Some influencers may request more from you than you are able to give. Some may even ask for the moon in a pretty little box with a bow. While you may roll your eyes as you sit at your computer, make sure you decline graciously. You are growing the brand and may cross paths again!

  9. Communicate, communicate, communicate!

    Communication is key to planning a successful collaboration. From your first email, all the way through your final follow-up, it’s important to keep your updates clear, consistent, and personal. Don't let all that enthusiasm go to waste and fizzle away by sending generic emails and updates. If you are ONLY sending general and generic updates then you are not building a relationship. Ask questions. Engage people. Build the relationship. Keep their interest and use that enthusiasm to be contagious.

    If your marketing plans change and your strategy changes it is always best to communicate with people you have already reached out to. People (bloggers especially) plan content calendars and are people after all. We are humans behind these pages. People are excited and get others excited about your product, especially after you have contacted them directly to build that excitement. When you have a strategy change that changes a collaboration, communicate that to keep the relationship intact.
     
  10. Bring your campaign to life.

    Contracts are highly recommended to ensure mutual responsibility.

    Have a plan (and share it with your influencers) for how/when you’re going to amplify your influencers’ content on your social channels.

    Keep the energy and enthusiasm going all through the campaign. Treat your influencers like the VIPs they are - regardless of whether your supporter is large or small, or has a targeted or diverse audience, remember they are your customers first. Treat your influencers, customers and other supporters with respect and consideration for any time, money or effort they’ve shared with you.

    Think about every step all the way up to your packaging. The Reveal can be one of the most important parts of building a relationship with a customer (and influencer), and taking time to add a personal hand written note, extra gift or just a word of thanks can make a big impact in your favor. 
     
  11. Follow up

    Make sure your selected influencers are set to post their content and that the agreement is met.
  12. Wrap It Up & Track Your Metrics.

    (Is your social engagement up? Are you seeing an increase in conversation about your brand? In website visits? In sales? Track everything to know what is and isn’t working.) Numbers matter but look at more than numbers to see if there is actual influence. Are they engaging? Are people responding? Do they respond to their community and comments?

Last but not least, remember to thank the people who participated! Again, this goes back to building relationships and maintaining brand message and keeping it personal.

And remember, Influencers are not one-and-done, but should be viewed as part of your brand’s family. Who knows? You may want to reach out for another campaign in the future so build on this relationship!

brand blog.jpg

Here’s the biggest takeaway of all: Any marketing effort is to BUILD customer base. Are you creating Relationships that are long term and will grow with you and convert sales? Are you keeping your brand message and relationships in EVERY interaction? Are you missing opportunities to build and create your team of support? If you take the time to write a note how much MORE value will it add?!

As a blogger, I work with lots of brands. Small brands, big brands. You name it.  I am contacted by brands often and I also reach out to brands to collaborate for my own small handmade business as well as this blog. It is so important that the brands I work with and share with you guys are brands I can truly believe in. Not just the product but the company. Getting "free stuff" is far less important than what I can BRING TO YOU GUYS and the value I can ADD TO MY COMMUNITY. Sometimes I don't even get "free stuff" but the brand is so awesome I want to share about it.

Effective Influencer Marketing for your brand is more than just randomly contacting people with a following or with a blog. It is about connecting your brand and brand message with the influencer and their community in an authentic way. It is about contacting and connecting with the right people and growing those relationships. And it can work for you!

ORGANIZE & PLAN

ORGANIZE & PLAN

Photo Hacks Too: Lighting & Instagram Live

I have gotten a lot of messages since my knit date with my gal Megan from Peppermint Pine shop about the table top tripod set in my crochet bag that we used for her Instagram Live video. So I thought this would be a great time do an update on my Photo Hacks post. Yup this post has affiliate links. I get credit if you buy these items. Let's dive in!

Checking the light meter setting up for pics

First let's talk lighting. Natural light is your friend. It is correct, easy to edit and gives you accurate coloring. Oh.. and it is FREE! But let's be honest, it is not always available. For me, I have one perfect area in my house that has amazing light. But for only 2 hours a day. When the sun shifts or if there is cloud cover then my photo plans are tanked. And while you can do a lot in post with apps and edit, it is extremely helpful to have some options.

I have an advantage having been a Production Manager & concert lighting technician and my husband still working in the field. So I get some cool toys I admit. But still, you don't need insider trading for badass lighting hacks. Here are a few I am fond of and use myself. Just remember this one thing: simulating natural light is not actual natural light. When you can, use natural light. Always. ALWAYS.

I bought this light kit on amazon because it has a great storage case and lots of options. There are LOTS of light kits so buy what is best for you but one thing is that no matter what light kit you get... BUY NATURAL BULBS.

The next thing is a bounce card. This will help you get more length of time out of that perfectly lit area of your home or studio. Basically, a bounce card is going to reflect light into a shadowy area. You don't need to be a photography pro to use one and in fact, this will illuminate your products in ways beyond imagination.

Next up: that table top kit from my knit date. It is what I call my secret weapon because no matter where I am I can always get the right angle. The right perspective and even the right distance. These will be your secret weapon too.

And for the products themselves, these are my MUST HAVES that live in my little crochet on the go kit and I use them for almost anything. Just not website product shots lol. Perfect for on the floor when I need that right angle. On the table. For Facetime so I can knit and converse at once. Yup... these are the ones you saw in the IG Stories with Megan and for less than $20 I got all I needed.

First up is my Jellyfish Mount. I love this thing. It holds my phone, my husband's phone (he has an iPhone +) and is so versatile and small and portable.

Now for my table top tripod. There are tons on the market. But let's be honest - this has a specific function. It is not for primary product shoots. I want something that is portable, lightweight and frankly can fit in my needle and hook case to go where I go. I also don't want to break the bank. I also didn't want something so flimsy that I would spend even more money replacing it. I did some solid research and this was where I landed and I love it!

There are lots of products on the market and everyone will always have their preferences. I can only tell you that I have in fact spent some money and time and found these to be the best, and for less than $20 it is worth a shot!

So get out there, get in the light and get your pics.

The Business of Handmade - Part 1: A Primer To Start Your Business

I have been very fortunate to find my creative journey and do what I love every day. I am truly living my dream. It is always magical but isn't always easy. It is TONS of hard work, even MORE mistakes than you can imagine, and some days I would rather play with a pile of yarn than be a business owner and do paperwork (I really loathe paperwork). And the truth is, by my own standard, I am not really that successful. I have SO MUCH I want to do and eventually land with my very own yarn shop with a classroom in the front for people to learn and share fiber love and an after school yarn program for neighborhood kids. Ah... I have so far to go. But I will get there.

And, while I am by no means a business guru or authority, I love sharing my journey and what I learn because it feeds my own success as much as it helps others. I get a LOT of emails, messages, tweets and posts asking for help on how to start a crochet, knit or creative business or open an Etsy shop. It is incredibly humbling. But... The truth is that this is a very difficult question to answer. There is no easy, "hey do this and you will be a success" formula. Every creative business is different.

You have to determine your own goals and road map. Hopefully, with this series: The Business Of Handmade, I can help you do that. Over this series we will talk about:

A Primer To Start Your Business (this post)
What Kind Of Etsy Shop Is Right For YOU
Do You Want A Business or A Side Hustle
If You Don't Love It Don't Do It

So let's get started!

Like I said above, there is no quick cookie cutter formula that I can give you to say do this and you will be a success. Having said that, here are 5 steps I took that may work for you and help you get your path started.

1. Open an Etsy Shop
Though the bulk of my business has moved off of the platform, joining Etsy was the best decision I ever made. Truly. Etsy gave me a place to get started, test the waters, learn about internet marketing and online sales without the burden of developing a full eCommerce site. It is SO EASY to use and setting up my shop took a matter of hours. When you join Etsy, it is not a magic wand and poof you will have sales. It takes work. You can use this link to get started with an Etsy shop and get 40 free listings!  (disclaimer: if you use this link, I will also get free listings as part of the easy affiliate program)

The next post in this series will dive into WHAT kind of Etsy shop is right for you.  Here are my general Etsy Starter Tips:

Join the Etsy Success Team. This is a team headed up by Etsy Admin for the community to discuss, exchange and explore ways to succeed

Read the Etsy Seller Handbook & Etsy Blogs. They are a wealth of information. Take the info and apply it to your shop. Not everything will apply. Go in baby steps. Do what you can so you are not overwhelmed.

Learn SEO. You do not need to become an SEO behind the scenes wiz. But it would be in your best interest to take time and learn the basics. Etsy has wonderful blogs and teams about SEO and how to make it work for you.

Take great photos. You don't need an expensive camera or to hire a photographer to get started. I still use my iPhone and some great photo apps sometimes. Show all the angles (front, side view, back view, etc.) and remember: Most shoppers are visual. Make your photos appealing.

Give all the information that you can without too much fluff in your item descriptions. That's not really the place to show off your creative writing skills. Give the facts: size, measurements, materials, use or functionality, etc. Check out my photo hacks here.

Use ALL the Etsy features. Etsy offers some really great shop features (About, Profile, online presence links). Use them ALL. Take some time to really think about telling your shop story in the About section but then maybe a little more about you as a person in your profile. Use the links to social media. I cannot say it again, Etsy makes it so easy why not use these areas?

2. Build customer relationships.
Social Media is an amazing overwhelming thing. I get it. But it is essential to grow your business in modern times because it IS your storefront. There are lots of different approaches to social media. You will have to work to find what's best for you and your business. Personally, I have more than one social media account. Some I use specifically for business, some I use to engage with other crocheters and others in the fitness community and other areas of interest.

I also started a blog as a way to take customers behind the scenes in both my design and creation process. It is a fun way to interact and share the backstory. I also offer free patterns and special coupons and articles like this that may be of help to my blog readers. We will be launching an in depth Social Media Series in two weeks.

3. Find your market.
In addition to my Etsy pattern shop, I also sell my patterns and designs on Ravelry and Craftsy. That is where my audience is. So if you know where your target market is, go there and sell to them. And look for new places to find them.
 

4. Build your own online presence.
In addition to my Etsy shop, I have my own stand alone website. This allows me freedom of design, content and inventory variation and control. It took some time to find the right platform. For me, I have a shop with supadupa and one with squarespace. BOTH are fabulous and offer incredible customer support. I have nothing but good things to say about them. I have been with each since they launched. Read Toni of TL Yarn Crafts talk about why this is important here.

5. Try new things.
My biggest tip is that you have to try new things. Some will work. Some will fail in epic proportions. But that is the best way to learn what works for your business. I cannot tell you how many things didn't work. But finding out that something doesn't work is not always bad. It often leads to something brilliant that does work.

Track things you try. Don't just haphazardly throw things at the wall hoping something sticks. Be deliberate and consider what will get you where you want to go. If something doesn't work, take a beat. Look at WHY it didn't work. Maybe it was an ad that just needs some tweaking. Maybe it was an ad that needs art and photos. Maybe it was the wrong demographic. There is ALWAYS something to learn from failure.

Finding those lessons and takeaways is how you will also find success. This is number 5 on the list but probably the single most important tip I can impart to you. Failures and mistakes are ESSENTIAL for success.

So there it is. My five tips to get you and your road map to a successful handmade business off the ground. The one thing I didn't mention (because I assume if you are here you know this) is you have to do the work. You can't be lazy. It takes lots of work and long hours but the joy and fulfillment I have found and continue to find is immeasurable. I work weekends. I work late at night. I work early mornings. I work! But I would not trade a minute of it and could not imagine it any other way.

Customer Service: It Is Ok To Say No

Next in our customer service series is an important topic: Sometimes we need to say no. It is hard to do. I know. But it is incredibly important. There are many reasons to say no, and developing the ability to do so without guilt and in a professional way is essential for success.

I have invited Molly from Spearmint Spruce to share more on this important topic. I love how Molly handles her small business and her approach to customer service.

Take it away Molly...

As a maker, it is a constant struggle to find balance. To not overload yourself, but also to push and challenge yourself to grow. And who wants to turn down a chance to make some extra money? So I have comprised a little check list to help decide when you can (and probably should) say no! And a few examples to follow.

If you are saying yes to these questions, then it might be time to say no:

1. Will it take away too much time to be with your family and those around you?
2. Will it add unnecessary stress or anxiety to rob you of the joy of making?
3. Will it take more time to figure out than is worth your profit?
4. Do you already feel stretched too think or overloaded?

I know, this is supposed to be a blog post about saying no. However, if you answered yes to any of these questions, then you should absolutely say no to the request. It does not have to be a permanent no, but it should be a no for now. Let me explain a bit why it is important:

Every maker is different - some are students, some are mamas, some are part-time, full-time, any-time makers. Family and those you consider family, should never take a back seat to your business. This life is too short to spend all your time working (no matter how much you enjoy it!) and not enough time with family. The balance is hard, but oh man is it worth it.

If you take on more orders than you have time for, your quality will suffer...either the quality of your product or the quality of your life. If it stresses you out or adds anxiety - say no! You want to enjoy what you do, and if taking on too much robs you of that joy, then it is time to say no. Make notes of how much is too much and be diligent on sticking to that number. The number that still allows your success, but also your enjoyment.

So many times I get asked, "can you make this for me?" and usually the answer is yes. However, unless it is something fairly simple, then the amount of time it will take to figure out how to do it will significantly take away from my profit as well as my time to be working on my specialty items. For so long I was a "jack of all trades, master to none". Basically saying, I could do several things pretty well, but it wasn't until I truly found my niche that I could perfect my items and offer them with great pride. So yes, I can probably make that for you, but it isn't worth it at this point. I would rather point you in the direction of someone who specializes in that product! And we will all be the happier for it!

If you already feel like you have too much on your plate, chances are it is time to say no. If you are stretched too thin, you will break. And that extra order or collaboration will do you no good. Your sanity is more important than anything. The holidays are a time especially when we find it hard to say no. I am in the midst of still trying to remember that it is ok to say no. Even if it is a friend or family member, this is your business - something that you worked hard to build. It is ok to do what is right and healthy for you and your business!

I wish I could say I have arrived -  I have finally figured out how and when to say no every time. Alas, I have not. But I do know how to be more aware and to work harder to have boundaries of when to say yes and when to say no.

I hope you are encouraged to say no when you need to. Get rid of the guilt or that feeling of missed opportunity. You will see growth and success when you are more balanced and are enjoying what you are doing! Happy making, friends!

New Year: Set Goals & Make Plans

As the New Year ads start running and posts about #resolutions are abound, I thought I would take this moment to share something with you: I am not a fan of New Year Resolutions. Call me cranky, but I am just keeping it real. I am a fan of Goals, I am a fan of Plans. Here is why:


  1.  I do not believe you need a specific calendar date to give you permission to chase your dreams, follow your passion or make changes in your life. These things should be ongoing. Always growing and always going forward.
     
  2.  Thanks to the age of marketing and advertisers, society has been wooed into setting lofty goals we likely won't achieve. Not because we are not able. But because goals require ACTION PLANS & STEPS to be attained. New Year's resolutions has become about setting the lofty goal - but what about the action step?

 As we enter the New Year I want to encourage you to take a beat and do some self examination. Think not just about the things you wish for the New Year, but the things you want to make happen in the New Year. Then think about ways to ACHIEVE the goals. The work you need to do to achieve them. If you ask yourself the tough questions,  I promise you will find the goals and action steps reveal themselves.

While thinking about your goals, make categories. What are your personal goals? What are your business goals for your shop? What are your career goals if you are not a full time maker? Having seperate goals is an essential step.

For many, a small handmade business is more than a job. It is a lifestyle. So it makes sense that personal and professional goals are intertwined. But I encourage you to separate them. I encourage you to find that separate balance that will help you then achieve goals.

Setting goals in categories is key to achieving them. I know this from experience. I shifted to a full time "maker" unexpectedly but found it was in fact the right move. And, since becoming a full time yarnie, running my handmade knitwear & crochet business, I have learned a lot about the need for that balance.

Left: January           Right: December

Left: January           Right: December

Last year I lost 50 lbs as a personal goal and launched this blog and launched my home accessories line as a business goal. Previously I had tried and failed to achieve all three goals. But by separating them and separating what they mean (personal vs. business) I had to make separate action plans and milestones to achieve along the way. Short and long term markers. Evaluations to help me be successful. It also helped me prioritize better.


Sure there were hiccups and failures along the way. Heck, there was one speed bump (read: epic failure) that cost me money, knocked me to my core and had me curled up in tears for three days. But what it didn't do is stop me. Because failure isn't the end and will happen on the road to success. It is almost is required.

And when that epic failure happened, the beauty is that by separating my goals and giving each its own action plan, the whole boat didn't sink. That failure may have caused a ripple in that category but the others were on track. It also helped when it came time to regroup because I had focus. There was no spillover.

While I know it's hard, I also want to implore you to embrace failure as part of the journey. See it as an opportunity to learn. Grow. Shift. It doesn't mean that you can't or won't achieve your goals. It just means that you may have to do some more work to get there.

So as we enter the New Year, be excited. Be resolute. But also be a planner. Take some time to really think about 2017 and how you can make it one heck of a year! Think about where you want to be in 12 months and what you need to do to get there. Then get going! Happy New Year everyone.

Customer Service & Handmade Business: 5 Things Every Small Business Owner Should Know and Do

CustomerPatternReview

The idea of taking our talents and passions to the next level and turning it into a business is incredibly exciting. The thought that people will want to actually PAY for what I / we create is one heck of a piece of awesome.  And the truth of it all is that happy customers spreading the word is what truly grows a small artisan business. Customer reviews matter!

But when we take that leap and find ourselves running a business it is essential that we take a beat and are prepared for some of the changes that will come. Sometimes talent isn't enough. Once we make the leap into a business it is essential to shift our mindset to be successful. Our art then becomes only part of the package. We must now center our focus on the customer experience.

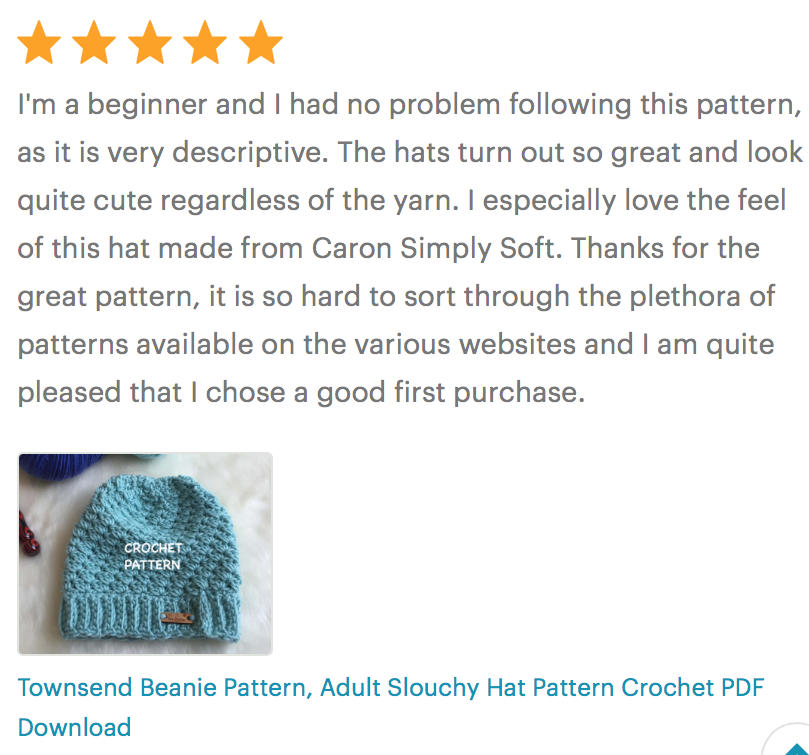
This was a review from a customer who received the wrong item. The solution turned this customer experience into a win.

I recently had a horrible customer service experience with a small artisan business. Part of me was so frustrated as a customer I wanted to scream. It was in actuality one of the most horrible customer experiences I have ever had. But more importantly than that, part of me was sad & frustrated as a fellow artisan small business owner that this person and her business simply do not have the basics for a successful customer service program. And the worst part was that in the whole exchange she wasn't even open to feedback to see this.

In the case of my recent experience, this artisan was simply unprepared to handle an influx of business, meet delivery dates and couldn't deliver on promises she made. She lacked customer communication skills to solve problems. All of which are essential in customer service. Especially the communication.

This experience is what inspired me to want to do a Customer Service series and why I've invited a few of my favorite small business owners who I also think have exceptional customer service to share their perspective on winning customer service.

Over the series we will cover:
The Basics: 5 Things Every Small Business Owner Needs To Know
It's OK To Say No
Custom Orders & The Collaborative Experience
Turning Mistakes Into Rave Reviews

First up: Krista Cagle from the Yarn Mamas and the basics of what every small business needs to know and do.

Now, if you follow me on Social media then you know I am practically a walking billboard of advertisement for the Yarn Mamas gear. Yes, Krista curates and serves up top quality and fabulous offerings. Comfy cozy wear and coffee mugs that keep my creative vibes flowing. But way more than that, her customer service is beyond reproach if you ask me. Aside from products I love, it is the thing that keeps me coming back again and again. In an era where we have choices of where to spend our dollars, I prefer to spend mine with small businesses who put the customer experience first. Krista embodies that concept. I thought she would be the perfect person to kick this series off with the basics:

 
5 Things every Small Business Owner Should Know and Do

Customer service is an important part of every small business. Here are five of the top things that I have done to create a positive experience for my business and brand.

1. Ask for Help

My business YarnMamas is built under my franchise Rescued Paw Designs. When I first started I quickly realized how incredibly hard, time consuming and stressful it can be to run two small businesses simultaneously. I felt like I was being pulled in many directions and I knew that if I wanted to continue to bring the same quality product to my customers, something had to change. I learned an important lesson: Don’t try to run a small business all on your own, ask for help. Once I hired a Virtual Assistant I was able to focus more on the quality of my product, customer feedback and building designs, which improved my overall customer service satisfaction.

2. Engage Customers on Social Media

I make it a top priority to engage my customers on social media. It shows consumers that you care, that you’re listening, and that you want to be involved. When sharing others projects and posts you are creating a community around your brand.

 3. Respond Quickly to Questions

I make sure to respond quickly and promptly to customer questions and to always keep them informed of their orders. My customers are notified, via messenger & email, when their order is placed, shipped and delivered. This has helped tremendously with customer satisfaction. I also send a follow up email after the customer’s order has been delivered, asking for feedback. It is important to keep communication open between you and the customer. If there ever is a concern, I always make sure to rectify the issue so my customers will want to come back again.

4. Listen to Customers Ideas

I occasionally receive messages from my customers who are looking for a particular design or look. I always keep the feedback of my customers in mind when I’m designing my clothes. I want my customers to feel heard and also, I want to make my customers happy and coming back for more. So when running your small business, always brainstorm new ideas and listen to your customer ideas (they know what they want!).

5. Updated Email List

An easy, but important aspect to customer service is to keep up an updated email list of your customers. It’s as simple as putting an email signup form on your website (I use hello bar) or an opt in button on your checkout page asking if they would like to receive marketing. I use this email list to send important updates, new designs alerts and as a way to keep past/potential customers engaged in my business. People lead very busy lives and it’s important to keep customers interested and informed about your business so they keep coming back.

I LOVE Krista's approach to the basics. It is those fundamentals that have set her new business on track to soar. What is your Customer Service approach? Share in the comments below.

Follow The Yarn Mamas on Instagram       
Shop Yarn Mamas Gear         

Make Plans, Chase Dreams, Live Happy (and with a plan)

Following the theme of Nicole's awesome Time Management Tips post, I have been thinking about my own time management and how to streamline, improve and trim the fat. I want to share with you something that is a game changer for me. It actually came down to something as simple as I needed a new planner. What? YUP!

Although I am a roam the earth free spirit artistic kind of gal, I am also a planner. Shocking right? Well, let me explain.

Ever since I got my hands on my first FiloFax as a wee young up and comer, I have been a fan of the organizer & planner. It serves so many purposes. Not just helpful with dates and schedule but... It is a great place to stash business cards and receipts; it hold notes and numbers and random thoughts. My FiloFax has been around the world with me over and over until it died and finally the last stitch came apart a few years ago. Oh the stories it could tell. And oh the loss I felt.

Sure we are in the digital age and there are apps and tools for workflow. But for me, I like pen to paper. I am a fan of writing things down. I also like to gather my thoughts, spend a few minutes of quiet time and getting grounded. My needs have changed as I began to focus more on my small business, so I looked for planners that did more than just provide a place to write things down. I wanted to PLAN.

In my search I stumbled upon Passion Planner. What is this? I have Passion. I need a Planner. Hmmm..... As I read more & found out about the company (which has a great story you should read here) and the planner I discovered that they use mind mapping to help set a course to achieve goals. WAIT!?!? WHAT???

I LOVE Mind Mapping. How is it that I have never thought of this, but Thank God they did! It makes such perfect sense. I had to get one of these. And let me tell you- if you are an artisan, small business owner, human being with dreams & goals - you will want to get this too.

Granted, at first it is overwhelming. But the word itself means you need more than a notepad... we are making PLANS. In the short time since I have had my Passion Planner I can honestly say my efficiency has improved. My focus has increased. My spirit is lifted. Can a Planner really be the source of this? YES!

Because if you take the time in the beginning to invest and get going with the tools provided in the Passion Planner then it really does remove the clutter and help facilitate success. It is more than just things "to do". By following the Passion Planner layout tools, it has helped me prioritize, remove some clutter and truly come up with the HOW to achieving my goals. I am also a fan of the downloadable inserts. Because.. um.. graph paper :-)

As I gear up for busy season, it is crucial to streamline and be productive & efficient. I have incorporated spending a few minutes with my planner to start my day and it truly has helped me regain some focus I had lost in the clutter of To Do Lists.  I am stoked to see how this continues and mind-map my way to achieving my goals.

And now, OMG - get this- the fine folks at Passion Planner are giving one Stitch & Hustle community member your very own 2016-2017 GameChanger Passion Planner. Um helloooooooo... get in on this. Enter below. Don't wanna wait to win one? You can buy one here

Disclosure: Passion Planner sent me this planner free of charge for the purpose of this review and provided the giveaway. Although this is sponsored content, opinions and review are completely my own.

Cozy Season, Simple Season

As Makers & small business owners, this is our time of year. This is the time we live for... these months leading up to the holidays and all that comes with it. But for us, this time of year brings a unique set of challenges in finding balance and enough hours in the day. I am always interested in how to improve in this area and squeeze as much quality into those hours as possible. I've invited one of my favorite makers, Nicole Knutsen of Naturally Nora Crochet, to share her tips for not just surviving the bustle of the season, but thriving through it! Take it away Nicole...

When I was a child, my grandmother would overwhelm us with loving gestures all autumn long. Family outings, special celebrations, and gifts upon gifts upon gifts. We would find ourselves buried in an avalanche of white tissue paper and golden tinsel every year.

I read a book when I was about eight or nine in which the little girl protagonist received a set of colored pencils in a wooden box as her Christmas gift from her grandmother. This little girl cherished her simple gift and rode home with it in her lap, cradling it like a treasure. That year, I wrote a letter to Santa asking for only one gift, making sure to specify that I did not want anything else. I wanted to feel what the little girl from my book felt-simple pleasure from a simple gift and the freedom to pour out gratitude for a humble holiday. Even as a young child, I felt deep in my soul a longing for that kind of joy.

That simplicity becomes more and more difficult to claim as we grow into adulthood, as we marry and integrate two families, as we commit ourselves to meaningful friendships, as we have our own children, as we start our own businesses. Simplicity and slow living doesn’t just happen, it takes commitment and work.

The demands and expectations of the coming season can overwhelm,  draining the comfort and joy out of all the things that bring us our happiest childhood memories, particularly when you are a self-employed-maker-of-cozy. Your boss can be SUCH a task master! I know mine can.

I am taking some steps this year to make this my family’s most intentional holiday season yet, even though it is also likely to be my busiest season as a maker yet. As I tiptoe carefully into fall, I will be focusing on five commitments to help achieve the humble, joyful season I so desire for my family. Care to join me?

Make a Plan

I recently created my own planner, customizing it to include all the areas of my life I am currently attempting to juggle. In addition to daily tasks, I have an area for my various business needs, including weekly goals for making, designing, writing, photography, and social media. By splitting these tasks up throughout my week and planning goals a few weeks in advance, I know how much work I can realistically bite off on any given day. This has literally saved me from insanity as the season has already begun to ramp up with market applications and collaborations.

In addition to my weekly planner. I keep a very strict daily schedule. I am strictly disciplined about work on my computer-writing, photo editing, and patterning must be done in the two hour window my husband and I plan for when he is home throughout the week, before the kids wake up, or after they’ve gone to bed. This is the only way I, personally, can be fully present with my children, which is top priority for me (this is what works for ME; no judgment here at all if you do it differently!) I allow myself time to crochet throughout the day, as the kids play at home or at a park, while they are at dance class or as we wait for an appointment, but my computer stays closed.

Take Time to Prepare

I am a designer. I want to be creating new designs and writing patterns all the time. I am a blogger. I love writing and sharing my heart and soul to encourage others. But, this time of year, I am specifically setting aside one day a week when I work exclusively on building stock for fall markets. For me, it is so easy to get distracted from building stock. I have about fifteen ideas roaming like free range chickens in my mind at any given time (I know you have NO IDEA how that feels!). Compartmentalizing my various business tasks keeps me moving on the parts I wouldn’t naturally do first.

Focus on People

So far, I have talked about organizing your many to-do’s. It is a constant danger for me to focus so much on my to-do list, that the people right next to me who get in the way of said to-do’s are dealt with swiftly and harshly. This isn’t how I want to live, and it isn’t the kind of mother or wife I want to be. I am working this handmade business life in an effort to spend MORE TIME with the people I love. I must have the self-awareness to realize when the opposite is happening, and the discipline to reverse the effects by refocusing on the folks I’ve been given to care for and the folks I am serving through my designs and handmade items.

Develop a Comfortable Pace

Small tasks done consistently over time add up to very big accomplishments! Treat yourself well by having patience with the pace that works for you. A super-productive day is great; a well balanced day is better. I never feel less satisfied than when I rush myself or my family and the simple pleasures of being together are lost on the highway of life. Take a backroad instead-as Phil Dunphy says, “Slow is smooth and smooth is fast!”

Claim Peace

Peace is lost when the expectations we feel from others or ourselves are not met. We feel restless, less-than, harried, and worried. But peace is not a state of being that simply alights upon you-you must be intentional about claiming it. For me, this means letting go of those expectations. I had a goal for September to publish “x” amount of patterns. It didn’t happen. There were days and evenings I could have worked on them and I choose not to. I took my kids to their grandparents or had a date night in with my husband instead. Things went undone. I made peace with myself and let go of the expectation that equates success with productivity. Last holiday season, I had Christmas cards all designed, even printed. They are still unsent, sitting in my desk drawer. I claimed the peace the season is truly about and let go of the expectation that equates an adorable photo sent out in December with familial bliss. Above all the commitments I am making this year, claiming peace by releasing expectations is by fay the most vital.

Plan, and prepare, yes. But I challenge you this year to keep you focus on people, move at a healthy pace, and feel deep in your soul a still kind of peace that will last beyond your busiest season as a maker.

Nicole is the amazing designer and artisan behind Naturally Nora Crochet. Get inspired & follow her on Instagram here.

Get Your Craft Fair On: Prep & Pack For Success!

Next up on the Get Your Craft Fair On Series is the perfect prep and pack. It can be overwhelming to think about all the things you don't want to forget. For me, that's a trap. Instead of focusing on what I need and planning, we find ourselves getting a bit frantic with "oh, and don't forget" items. That can lead to stress trying to remember and missing things you need. This is all easily avoidable with some solid prep and packing for your event. 

For me, I break it down into four categories. This helps me go through each aspect of the event so I really don't miss a thing. I start this process as I am building the display and that way as I think of things, if they are not on the checklist already, I just jot them down. By the time for packing rolls around, I am a lean prepped machine and packing is a breeze.

Here are the categories and how I break them down followed by a sample of the checklist I use.

BOOTH: Display

Now that you have the perfect display layout for your items, make a detailed list of what you will need to get set up. By keeping the Booth Display its own category, you can focus strictly on the mechanics of setting up your display. Do you need any tools like a hammer, screw-gun, pliers, etc.? Do you need string or push pins? Will you need a step ladder or trash can? Go through each stage of your booth set up and make yourself a list of items you will need. Pack them all so that you can set up your booth exactly as you envisioned but also be prepared for what may come up!

BOOTH: Selling

What will you need to sell your products? What about payment processing; have you tested your device and updated any apps? Did you set up for Sales Tax and know the rate? Do you have business cards and a place to put them? Will you be taking custom orders? If so, how will you keep them? Do you have an order form? What about color swatches for your customers to select from? Do you need your business license on hand, is it required by the event? This is the finishing touches stuff that means so much. It is imperative to maintain brand through the whole selling experience so think of what you need to do that.

PRODUCT:

Prepping inventory can be overwhelming. That feeling of the need to make ALL THE THINGS. Take a beat. Breathe. Go through your current inventory and decide what you need to add. Make yourself a small list and production timeline to get items ready. Set mini goals such as 10 scarves week 1, 5 hats Monday, etc. Based on what you can truly achieve, don't over pressure yourself, you can create a schedule of what to make.

I also like to make a full inventory list of what I am bringing. This helps me track sales and inventory throughout the event and keep things easy. In addition to product for the event, you may want to make a list of what will be put out first so that can be packed where it is easily accessible. And, while in theory we should have all of our products prepped and ready, I always find myself with last minute To-Do's. Maybe you need to add fringe to an item. Maybe add a hem. I also like to have Work-In-Progress projects on hand to work on during slow moments in the booth. It is a great conversation starter and can help pass the time if you have down time.

HOTEL (if applicable):

For me, I like to have my tea and oatmeal. It is easy, portable and I can make sure I eat something everyday because it is easy to forget. So I have a little kit I take.

I also have my personal essentials to take to the booth each day: Travel Tea Mug, Flat Outs for my poor feet, mascara, lip gloss and face cream. If I've got these I am set for the win.

You can use this checklist that helps me or just make yourself a list of what makes you happy and get prepped to pack for success.

5 Reasons Your Handmade Business Needs a Website

I think that the topic of whether or not to get your own website comes up a lot in our small business & artisan community. I cannot stress enough how important it is to begin your online branding & presence. But don't just take my word for it. Below, guest blogger Toni of the awesome TL Yarn Crafts shares her perspective:

Close your eyes and imagine this: Your handmade business is moving right along. You’re making sales, packing orders, life is sweet. Then you get a call about the opportunity of a lifetime – a boutique across the county wants to carry your product or a major craft show wants to know more about you. So, where will you send them?

Sales platforms like Etsy and Amazon Handmade are great for making sales and developing customer loyalty to your product. But as we all know, businesses and brands evolve over time, and your needs may extend well past just making the sale. That’s where your stand-alone website comes in. Here are 5 reasons why YOU need your very own site: 

Reason #1 – Define Your Brand. Websites are a blank canvas waiting to tell the world who you are. If you have a clear brand strategy (colors, fonts, logos, images, etc.), going to your website should be like opening the door to your storefront for a customer. Determining the look and feel of your website will be the first step to helping visitors fall in love with you and your product.

Reason #2 – Engage and Direct Your Visitors. Let’s say you put a link to your Etsy site on Instagram. The implied call-to-action is to have them buy something, right? But what if you want them to do something else, like subscribe to your email list or RSVP to an event? Having your own website lets you drop breadcrumbs for your visitors to lead them where you want them to go. You have the power to create buttons and graphics on your site that make your media easily accessible to your customer.

Reason #3 – Make A Good Impression. Unless I’m mistaken, you’re interested in getting more than just retail customers through your virtual doors, right? Building a clean, beautiful website that is easy to navigate is immensely important if you want to attract store owners, sponsors, and the media. It says a lot about you, namely that you have it together and are ready for potential business relationships. Remember that boutique across the country that I mentioned before? A great website versus an Etsy page might be the difference between “absolutely” and “no, thank you”.

Reason #4 – Give Yourself Room To Grow. Since I started by business 3 years ago, I’ve introduced new projects to the TL Yarn Crafts lineup. In addition to finished pieces, I now have a blog, I teach on and offline, I do craft shows, and I sell kits and patterns. It would be pretty tricky to communicate all of that from my Etsy page. Adding new pages and plugins to my website helped keep my message clear while still accommodating my growth. And that is not to say your have to grow beyond just selling your physical product. But a little breathing room doesn’t hurt. You never know what tomorrow brings.

Reason #5 – Keep the Focus on YOU! As an online shopper, the “Other products you might like” section is super helpful. But as a seller, it makes me cringe. Why go through the effort of guiding a customer to your sales page only to have that very same sales page take them somewhere else?? *queue the face-palm* The main reason to have your own website is to keep the focus on YOU and whatever message you decide to deliver. Carve out your corner of the internet and plant your flag!

Once you’ve committed to launching your own website, it’s time to do a bit of research on what resource is the best fit for you. Pattern by Etsy is great for Etsy sellers whose main concentration is sales. Shopify, Big Cartel, and Wix give you a bit more wiggle room, adding in features that feel like a traditional website. But if you want to go big or go home, Wordpress is the way to go. Whatever you choose, a stand-alone website can be a game changer for your handmade business.
 

About Toni:

Toni Lipsey is the Owner and Designer behind TL Yarn Crafts, an Ohio based fiber arts studio for the modern cool girl. Find her collection of crochet accessories, patterns and maker gifts online, and follow her tomfooleries on Instagram.


Get Your Craft Fair On: Setting Up The Perfect Display

So you've applied for the perfect Craft Fair and got accepted. Woo Hoo! Now time to prep your display. Say What? It can be a daunting task to visualize and then realize your first craft fair set up. Have no stress. We got you!

First let's talk about your overall set up. The design and layout of your booth or display is more important than many realize.  It is not as easy as popping open a few folding tables, spreading out your wares and waiting for the masses to come rolling in to buy. I have learned that the design of your display is as much a factor of a successful show and sales as the products themselves.

Before you can even think about your display, first you need to think about WHAT you will be selling.  I have a variety of inventory but don’t bring all to all events. Now sure, some say “well, if you don’t bring it you can’t sell it”. But that’s not true. You can take orders, ship to customers if you don’t have something on site or any other ways to sell.  You want your booth to have a cohesive look and feel. Not everything you carry will work. Think about the audience and customer base who will be attending the event and what will work.

Now that you know WHAT you are selling, it is time to focus on the display. Think inviting. Think clean. Think cozy. If you sell touchy feely products you need to make sure they are accessible. Think about how a customer will experience you, your brand and your booth. Then get to work on your display.

A word of caution before you start buying things: it may be worth it to find out if the event is supplying or renting tables to vendors. While renting may seem wasteful when you can OWN and continue to use something, you run the risk of ending up with lots of "stuff" that didn't exactly work out. You may be able to rent a table and chair from them for a small fee and use the rest of your budget on display set up. This allows you to play around until you find what works best for you. Test then buy is my motto.  And before you buy, see what you have around the house that can help with your set up. Maybe you have baskets or stands. You can decorate shoe boxes. Get creative.

Build your booth in advance so you can truly see what will work. I cleared out our dining room, tape marked the floor to the exact size of my booth and did a few test runs. No matter how good things look on paper I cannot tell you how valuable this was. I was able to truly see what worked and what didn’t and it also helped things go smoothly on actual set up day.

Keri from Izy & Oly did a great job of maximizing space and displaying product. Customers can get a clear view of all fabric options and the variety of products. She really maximizes space by going up and down and her use of baskets keeps things organized and clean.


I love the look that Janet from Flowerchick Designs uses. You can clearly see her products and the variety as well as her branding. At a glance people are able to seethe colors and array of items. Her prices are clearly marked which is a big thing in display set-ups. You want to be able to answer customer questions, but also have the information available. By covering the tables with long table linens she can keep her extra inventory handy but still keep her display looking clean.


When I did my first event, I was given a 5x5 space to show my work and be ready to sell for four days in one of Chicago's biggest markets. No stress (are you kidding? I think I cried more than once).  I had to maximize space but seem inviting and show my offerings. I decided to go up and down much like Keri did.

My total booth set up cost under $200 (which was $50 more than I budgeted so there's that). I used the dress forms I already had for my product photography and bought an additional set of Styrofoam heads to display multiple hat styles. I bought a variety of "Laundry" baskets at discount and filled them with lots of colorful product. This allowed me to utilize the floor space in front of my display table and also invited people to touch and feel. I actually became known as "the touchy feely booth" by the end of the event and it worked out perfectly because there was always that "crowd" vibe and fun at my booth.

Instead of "tables" I bought stackable plastic drawer totes and covered them with a solid black sheet. This allowed me to keep my inventory restock out of site to keep my both looking clean. It also allowed me to keep my restock accessible and handy as things sold.

When I moved up the following year to a full 10 x 10 booth in the Fashion District of the show I had to step my game up. But I knew it would be a long term investment as well. I brought the storage units from my studio to create a Wall Of Color. I also visited stores that were going out of business to see what I could get on the cheap. I got a $1500 wall rack full unit for $125! And at a closing JC Penny I got a full set of mannequins for $50! Kinda cool.

I have since made additional changes to my set up to better invite and serve customers. I also tailor my set up to the type of event. I always start with what will I be selling and where is the event. Then make necessary tweaks to my set up as needed. But it all starts with a base set up.

Whatever your set up - it is essential to be able to keep your display well stocked. When you make sales re-stock quickly. While empty tables and shelves might be a good feeling of accomplishment, customers like to shop and browse and have choices. It is a shopping mentality. So keep your re-stock handy.

Do you sell things that need to be tried on? If yes, don't forget to have a mirror AND a place where people can see themselves in that mirror. I once saw a booth hang the mirror so far in the back corner it defeated the purpose of having one because no one could use it.

Another thing that is so important is your signage. You want to be able to have brand recognition and let customers know where they are shopping.

Last, but certainly not least, be wary of overstocking and of excess. You don't want things to seem cluttered. It is a fine balance, but an essential one. Clutter turns customers off and excess (things like extra chairs, waters, etc) make it look more like a hangout than a booth.

It is a lot but do not be overwhelmed. Take a step back and vision your booth. When thinking of your display here is a list of things to consider. Answer these questions and use this checklist to get started to building a successful display. Share your pics with the community on Instagram tagging #stitchandhustle


Insta Updates: Tips & What's New

Wow Instagram has come on strong with the latest round of updates. Let's take a look at a few of them and how you can use them to up your social media game. 

First Up: Stories. Now, I'm going to skip over how much this is like Snapchat because that topic is covered all over the web. I want to focus on why I think it's awesome and you should too. 

Instagram Stories goes out right into the bar of all your current followers. So it is enhancing and growing that relationship. That's awesome!  Isn't the whole point of connection on social to actually BE social and grow relationships? Heck yeah!

If you don't want to scroll through the whole bar of stories and end up in a never ending time suck of social media eye candy, you can simply go to someone's profile directly. If the circle around their avi is lit up with color, then you know they have shared a new story. To see it, simply hold down their avi. This keeps you free from all the stories of people you follow rolling into the next like a slide show and you just see that person's story.

I also love the message option. When viewing your story, people have the option to message you in response to your story just as you can message those whose stories you view. This is such a great opportunity to connect and develop relationships. In the few days since Stories launched on Instagram, I've both sent and received messages and already made new connections! That's a social media WIN!

The privacy options are basic but good.. Separate from your feed, you can decide who sees your stories and who can respond. That's a great option for those with personal accounts who may want to limit interactions as opposed to those with a business or brand account. 

Another great feature is the option to see how many views your stories have gotten and who is viewing them. This is helpful to know what your audience is connecting with and who you can reach out and connect with as well.

Next Up: I want to talk about the option to make your account a "Business Account". This is cool because it allows you to add a "contact" button which also frees up space in the limited Profile area where many business accounts put contact detail. It allows for a very clean professional look.

Another awesome feature of switching to a business account is it gives you native Instagram analytics. Best times to post, how your posts are doing and a starting point to build an effective campaign. This is essentially all you need to know to grow your account.

Even so, I'm still not 100% sold on this new option and here's why: Instagram is owned by Facebook. Yes, it's an entirely separate platform but we cannot ignore this relationship. I have to wonder if by siphoning out which accounts are business versus personal, if this isn't paving the way for a long term objective of Pay To Play for those businesses like Facebook has become for Pages. 

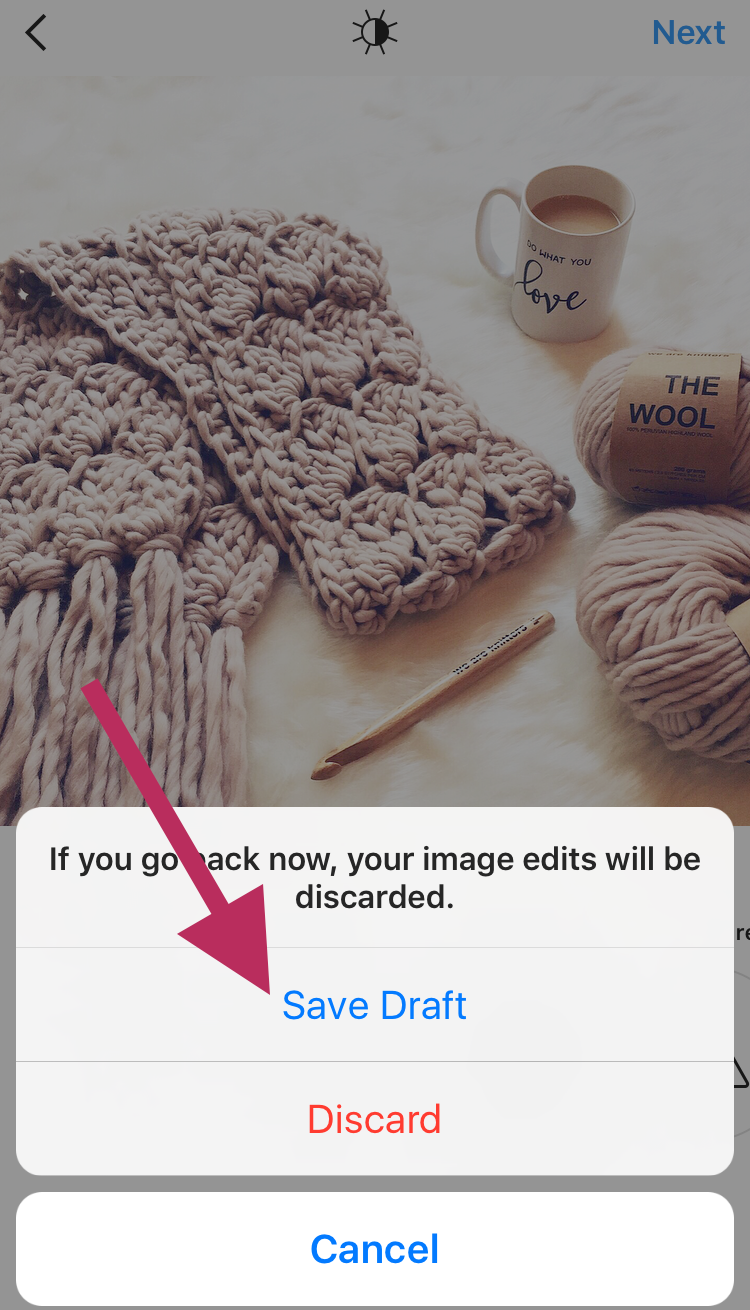
Another cool little update is Drafts.  This is awesome because I hate it when I've done some "edits" getting ready to post and then for whatever reason step away but don't want to lose all that work. Now, when I back out it allows me to create a draft. This is also helpful if I've got some down time (it happens like twice a month, but hey) because I can create some posts and keep them as a "draft". This way when I'm super busy but want to post I can pull up a draft and keep my presence while not taking up too much time.

I am pretty excited for these updates and think they are a great opportunity to grow on Social! What do you think about the updates?

Get Your Craft Fair On! Finding The Right Event

The year is just flying by! I cannot believe summer is almost over. So it is definitely time to kick it in high gear. It's August and you know what that means... September is just around the corner! That means cooler weather, Harvest Festivals, Cool Craft Fairs and Holiday Markets are just around the corner too. NOW is the time to prep. Actually - June is when I personally start prep but August works too :-)

Are you ready to get your Craft Fair & Festival on? Throughout August, we will have a series of posts to help you get Craft Fair Ready. I am by no means an "expert" but can share from my own experiences to help you elevate your Craft Fair game. We will feature posts on:

How To Pick The Right Craft Fair For You (this post)

Which Payment Service Is Best For You?

Setting Up Your Display For Success

Prep & Pack For A Successful Event

Check List Central Because We Love Lists!

I love attending Fairs & Festivals as much as having a booth. As an online store owner, it is a rare and special opportunity to get out and meet customers face to face. It is a chance to talk to other artists and vendors and grow in community. It is an opportunity to introduce new people to my work in a way that you can't online: by showing them the value of cozy handmade up close. But my love of all things Festivals doesn't transcend to just any festival! It is essential to be part of the right one.

So let's start at the beginning with the biggest, and seemingly most daunting, question: how to find and pick the "right" event. If you do not already have some Fairs & Festivals you know you want to apply to, here are some great links to find out about Fairs in your area:

Arts & Crafts Show Yellow Pages
Festival Net

Stitch & Hustle Market Season Tips

Research. Research. Then research some more. It can be such a sucker punch to have a "bad show" when it was all avoidable by doing just a bit of research as to what show you should apply to. Just because a Fair or Festival has tons of traffic and your target market, there are other factors to consider, such as weather and time of year. I sell cozy handmade accessories, mostly chunky heavy knitwear. So while I love a couple of local Chicago Summer Festivals, I know I have to love them as an attendee. Do people want to think about heavy knitwear in 90 degree temps outdoors? Nope.

Besides seeing if your work will be a good fit for the event, also consider is the Fair a good fit for your brand! Some things to consider and ask:
Do they only sell handmade or will you be up against a variety of small home based businesses (ie Scentsy, Chloe & Isabelle, etc.)? 
It is always good to know who will also be there. You can check previous year's events and vendors to get a feel if you will be a good fit. If your work will fit in well, but also if who already is at the market attracts the same type of customer as you.

What is the typical traffic at the show? What is the last 3 year attendance?
Again -do your research. Event track records speak for themselves. While "First Annual" has lots of hype and fun, it is a much bigger risk. I like to see an event that has grown in attendance. It tells me that they keep adding value and not only do people go back but they also attract new people. Also check the vendors - do they go back? This will tell you if they found it a success or not. I mean, would you go back to a Fair you lost money at and did not sell well at?

Does the event have a strong web presence? Website? Facebook page?
This will be a huge factor when it comes to advertising. It will tell you if they do a lot of the legwork or expect the vendors to do it all. There should be a good balance, but more importantly when you drive your customers to the event site you want them to get excited to go support you there and bring friends.

Be mindful of deadlines. Be ready to get your application filled out the minute you know you want to apply. Here are a few quick tips for the application process:
1. Keep your bio short but lively. Let your personality come through but maintain professionalism. It is a tough balance so write your bio and have it saved and handy to go when you need it. Describe you, your work and what inspires you. And check your spelling! For real tho!

2. Send only high quality clean product photos. This is not your Instagram feed. You want to show your products, and especially if it is a juried show, show the quality of your work. Over stylized photos can take away from your product.

3. Read the full application directions thoroughly. Follow all of the steps, provide all of the requested materials on time, and completed. 

Most shows, fairs & festivals have fees. Fees range from application fees, to booth / stand fees, to tables and chair rental fees. It is essential to look at not just the application and booth fee, but all of your related costs when deciding on a show.  Here is a small checklist of things to consider about fees to get you started when considering if an event is right for you.

Factor in all of your related costs then determine what is your true break even number. Know it. Then ask yourself; Is the fee worth it? Can you make it back? Can you lose it if you don't make it back? Those are hard questions and I cannot stress enough how important they are.

Let me also take a moment to say this: No matter how much you research and prep and plan, sometimes events go wrong or people don't buy. So I suggest to have the mindset of a weekend in Vegas. Have fun. Consider the fees and costs that go into setting up to sell your wares a donation (that is what I call a Vegas gambling allowance). It is an investment into your business. While you hope to make it back, and then some, at the event, I believe the key is to not stress about it so having budgeted and the mindset that it is an investment will set you free from that stress. Because if you are not stressed, you will have fun. And if you have fun, you will likely have sales. And Sales is the ball game!

So with that I say: Happy Craft Fair season everyone.

Do What You Love, Love What You Do

Sunday Reflections:

my happy place: on location

Sunday morning. I'm up early, coffee in hand and sitting here working on my Lookbook and Marketing materials for the 2016-17 season. I couldn't be happier. 

Last year at this time I was stressed. Stretched thin. Trying to squeeze hours into already packed days. I was sad that my time to create and crochet was limited to but a few hours a day and I wasn't finding much joy in it at all because my mind was filled with all the things I needed to do. I was canceling and juggling plans and meetings and always running behind.

I had several projects in play at the time: Prepping for the launch of this blog (which is my passion project for a community that I deeply love); launching an extension of the blog: a consulting agency to assist other artisans become successful in their marketing & social media efforts; development of my tech start up (which was my brainchild and baby); designing new projects AND prepping to go back on location for a new show for several months. Not to mention family and home responsibilities.

Then I had the light-bulb moment.

While meeting with the seed money investor for my tech start up, he said something that changed everything. I do not think he anticipated the answer he got, but it was the right one.

my happy place: cozy crochet corner

He said: Michele, something has to give. To move forward you need to be 100% in this. You are spread too thin and before we invest further I need you 100% in this. Skin in the game beyond finance, this has to be your sole focus.

In that single moment, without even needing to think about it I had total clarity. He was right. While my idea and this project was amazing, it wasn't what I wanted to pursue 100% of my time. I wasn't willing to give up my other loves. Other loves which, oddly as it may be, compliment each other and give my life balance.

Look, walking away from my incredibly needed, viable start-up with seed money on the table was not easy. Especially since it fed my inner geek and I truly love the tech & start up community. But it was easier than I imagined and that's how I know it was right and why I've never looked back with regret. The same with walking away from the consulting agency.

I'm a creative. I'm a small business owner. I am not an entrepreneur. And because I know the difference I'm able to invest my time and resources into the places they are needed and the places that will grow. This clarity allows me to have focus which is essential when it is time for the tough decisions. By walking away from those 2 projects I brought the balance and joy back to my life and as a result, my business and this blog are thriving.

This doesn't mean I won't have other ideas and be part of new projects. This just means I have clarity and focus and both of those things feed my passion which leads me to success. But more importantly, it leads me to happiness. I am truly doing what I love and loving what I do!

Are you spreading yourself too thin?  Do you need to cut some projects loose? I encourage you to take a deep honest personal inventory this week. It will change your life like it did for me.

Five Product Photography Hacks For A Homemade Studio

Whether it is for your website, promotional materials or to post on social media, product photography is crucial for success.

But what if you are not a pro photographer with full light kit and studio? Here are five tips, tricks and hacks to help you DIY yourself into better product shots.


Tip 1: Change Your Scene
You can order very inexpensive backdrops from Amazon. I got the Elle Bella Paper Backdrops shown here for $10 each! Then just tape it to the wall that gets the best light and boom: you have a studio.

Or, if you are so inclined you can go the extra mile and order a set of stands to hang the backdrop from. I got this Limo Studio set shown here for $35 on Amazon.

Tip 2: Clean Light Box DIY
If you have smaller products and want that clean white lightbox look, hit up your local craft shop and get 2 pieces of poster board. I got the pieces here for a total of $3 at my local Hobby Lobby.


Tip 3: Steady As You Go
Even if you are using your phone, as I personally do about 50% of the time, invest in a tripod. I got the one here for $25 from Amazon and spent another $10 on the Jelly Fish Spring Mount for when I use my iPhone.

Tip 4:  DIY Floor & Backdrop Board
The truth is, sometimes it is just better to go with the classics and drop your product on the floor in a well lit room and shoot overhead. But what if your home rocks a 1970's avocado shag carpet? No prob!

Get yourself one of the $10 paper backdrops I mentioned in tip #1, grab a $2 piece of foam board and glue the paper to the foam board. Instant flat board backdrop. Ideal for almost any product and portable to go wherever you have the light!

If the light hits that one impossible sweet spot - no worries! Just get creative. I often use drawers to prop up my backdrop board in the bedroom that has the best afternoon light.  


Tip 5: Use Props
I realize it may sound counter intuitive because you want to keep focus and showcase your product, but the truth is that your image tells a story about your product. So use props to help tell that story and maintain your brand message. I love this mini chalk board I got on clearance for $2.50 but you can also use whatever props are in your home and fit your  brand message and vibe.
 

Hope these tips help you get started to better product photography. Feel free to also share your own tips and hacks below in comments. Happy shooting :-)

Stitch_And_Hustle_Tips For Better Fiber Photography-2.png

Don’t Just Be Busy: Be Productive! A Simple Tool for Increasing Daily Productivity

Guest post By Alissa M. Trumbull

Sometimes I have these mornings where I’m paralyzed in bed. I can’t move. I won’t move. I’ve spent the night mulling over what seems like 100 things that need to get done the second my feet hit the floor. Instead of getting up and running, my head feels busy and not productive, and I spend the day running circles around myself like a dog chasing its tail.

I know that I, like many others, continually look for ways to increase productivity. Some days are hard: I might have writing to do, errands to run, a vast number of emails to read and reply higher than a preschooler can count, and a job or two outside the house that require me to be dark on social.

A few weeks ago as a guest on #H2HChat, Brian Moran shared what he does to be more productive every day. Brian broke it down for us and showed how tasks on packed days – and the easy ones, too – can be grouped into four categories:

Urgent – It has to get done today. Don’t go to sleep until it’s finished.

Important – It really needs to get done today. Don’t get in trouble for not doing it.

Everyday – The daily routine. Muscle memory items.

Nonessential – If it doesn’t get done today, it can happen tomorrow. It’s okay to sleep on it.

This blew my mind. Such a simple categorization would allow me to provide better structure and more meaningful organization to my day. As a big fan of post-its, I’ve taken to laying out each day since then in these quadrants.

In the same chat, Brian noted, “Today is for execution; planning happens the night before.” So, now I wake up in the morning with today laid out from the previous evening. As my day goes on, I am able to remove items from my digital list. Ideally, I’ve done everything in the first three categories by the end of each day (and god forbid I forget to feed the cats!).

It’s amazing how my overall stress level has decreased and my productivity has increased during the past few weeks as I’ve utilized this new system. I no longer wake up fearing a lengthy to-do list. Instead, the visual division positively impacts my day, allowing me to be more organized, less busy, and more fruitful in my day-to-day activities.

I feel better. My relationships are better. My work is better. My life is better.

ABOUT Alissa:
Alissa is a Community Gardener for BTC Revolutions. Her purpose in life is to help people find their aha moments. She lives in Denver with her husband and their two cats, and gets to see the mountains every day.

Pattern by Etsy: Is It Really Your Own Website?

photo from Etsy blog

photo from Etsy blog

You may have heard, either by news article, blog or an email from Etsy, that Etsy has launched a new Web Service: Pattern By Etsy and are rolling it out this week. Here is a link to the Etsy blog launching the service and the Entrepreneur post.

I can't say I am a fan of this but to serve you best, I will be objective...

On second thought, nah.. let me just lay it out for you. I am finding more bad than good here.

Let's start with the name: Pattern by Etsy. Who thought of this malarkey? I mean really?

In my first 24 hours using the service and reaching out to their customer support there was instant confusion, more than once. You see, I (like many many others) sell my original patterns on Etsy. So their support thought I was having an issue with a Pattern transaction. You can imagine how frustrating it gets spending the first group of emails trying to get them to understand I am talking about their feature not my patterns. Even when my email to support said "I am having trouble with the new website program Pattern by Etsy"... they still came back with instructions on how to download a digital pattern. No kidding.

It blows my mind that they would name it Pattern by Etsy. But moving on...

Pattern by Etsy is slick. It is glossy and pretty and easy to use. The set up process is a matter of a few clicks. Because it is a mask of all the data Etsy already has in your Etsy shop, there is no import. The items are linked on the back end.

You can select from a few Theme Templates and each allows a bit of customization. The customization is quite limited though. You cannot "add pages" or really customize the type of content on your site too far away from what is already in your Etsy shop. The initial content from your Etsy shop comes over and you can edit as needed but again, within the parameters of what Etsy already allows. But it is easy to use and setting up the entire website took a matter of minutes.

At first glance, Pattern by Etsy has all the trappings to entice crafters, hobbyist and small business owners already using Etsy. But hold on... it also has limitations and constraints that make me tilt my eyes,  smirk and shake my head.

Going beyond the fact that Etsy takes 48-72 hours for your site to go live (which baffles me being that they are in fact a tech company) let's talk about the nitty gritty.

Pattern by Etsy is designed to keep you within the Etsy vortex. Similar to how Etsy itself works, Pattern by Etsy will not let you link to an outside site. For example, on the “About” page, I wanted to link to my standalone site www.144stitches.com. The link would not go live forcing customers or site visitors to see the text but not have a clickable link. They would have to “copy & paste” the text into their browser to get to my site. But If I put the link to my other Etsy shop, www.144stitches.etsy.com then the link is live. So you see, it is not actually "my website" as I am still playing by Etsy rules keeping the consumer and me, the vendor and in this case site owner within the Etsy vortex.

Additionally, Checkout is still run through the Etsy check out system.  So customers are still not buying from “you” but are re-routed back to Etsy. This means if they do not have an Etsy account, they will be required to create one.

You work hard, marketing your shop and promoting your work. You spend lots of man hours developing your brand and driving traffic to your new website. In fact, you spend the extra $16 per year Pattern by Etsy charges for your very own domain so you are not using the “patternbyetsy.com” extension to further drive traffic directly to your site and create brand name recognition.

But, in compliance with Etsy TOU, you are NOT allowed to collect emails of your customers or market to them once they have made a purchase. You see Etsy views them as "their" customers and only Etsy is allowed to use their email for marketing purposes.

So now you have your stand alone site doing Etsy’s legwork… not your own. Your brand is now linked to Etsy on a deeper level and all the work you do to get traffic and customers to your site is wasted as you cannot grow them into returning customers. Yes, you are paying for the privelege of doing Etsy's marketing.

Pattern by Etsy promotes Unlimited listings and that you do not have to pay a “listing fee” to add items. But you have to pay $15 per month and still have the listing fees due Etsy any time you add an item. And since you can ONLY add items by adding them to your Etsy shop there is no way around that fee even if you plan to drive traffic only to your new Pattern by Etsy website.

So now you are paying the $15 monthly fee, $16 annual fee for your domain and your Etsy listing fees of $0.20 per item and Etsy takes a 3.5% transaction fee per sale. These fees add up quick. Seriously do the math. and you have to still follow the Etsy TOU though you technically have your "own" website.

One last nail in the Pattern by Etsy coffin is the fact that if you have multiple Etsy shops (as I do) then you must create multiple Pattern by Etsy websites. Yup... they STILL will not allow a single account to operate multiple shops. So in my case, where I have 3 Etsy shops, take all those fees I just mentioned above and multiply it by three. Not to mention I would need 3 separate domains, 3 separate marketing plans, etc. I mean what a confusing headache!

Look, I love (and hate) Etsy. It is how I got my start and has opened so many doors for me. But Etsy today is very different than the Etsy of old and I really can't help but feel like Etsy is scrambling to create new revenue streams by making features that entice users but are just to keep investors happy now that the curtain has been pulled back. To me this feels haphazard and without much forethought for the user, which is the Etsy customer. And I am not talking about the consumer. I am talking about small businesses who use Etsy to sell their wares. Those are the Etsy customer. The money makers for Etsy through fees upon fees. Yet here we are again...

So what do you do?

You are not helpless and if you want your own website and domain go get it! But be responsible and check all the options. If you have big Etsy inventory and are attracted to the fact that Pattern by Etsy integrates your Etsy inventory, maybe you will consider IndieMade or SupaDupa or SquareSpace.  Each allows you to import your Etsy products and I know IndieMade syncs as you sell. And if you have multiple Etsy shops as mentioned above, you can import from multiple shops. Come on... no brainer!

I am a huge fan of these platforms and if you do the math you get way more bang for your buck and have true site ownership and control of your brand!

IndieMade, Supadupa & SquareSpace allow you to add pages and truly control your content as well as customize any of the free templates they provide. You can create a blog to share news and updates if you want. Pattern by Etsy simply allows you to link to an offsite blog, as long as you don't sell anything there because that would technically violate Etsy TOU.

Personally I use Squarespace, though I have used both IndieMade & SupaDupa in the past. For my needs, Squarespace is working great. On my current standalone sites (I have 2) I can list whatever I want (or not). My monthly fee includes listings, data storage, email and whatnot. 

Another option is to get a domain from GoDaddy or a similar service for a few bucks a year then have it direct to your Etsy shop. For as little as $5 a year you can have your very own domain to begin your branding and still it takes customers to your Etsy shop. There - I just saved you over $180 a year :-)

Bottom line is that there are tons of options if you are ready to take the leap, have your own website and begin building your brand beyond having an Etsy shop. I just think anyone considering Pattern by Etsy should take a beat and do the math and decide if it is really right for them. And I think that Etsy needs to find a way to reconnect with the Artisans who helped get it where it is.

Are you using Pattern by Etsy? Are you considering it? I am interested in your thoughts so please join the conversation in comments below.

UPDATE:

When I contacted Etsy to cancel my "free trial" within the 30 day period, I was informed that it would take SIXTY (60) days for me to get "ownership" of my domain, that I purchased through the sign up for Pattern by Etsy so not to use the "patternbyetsy" extension. I was baffled because didn't I "own" it when I paid for it? Nope. Etsy does. And because of ICANN restrictions, they cannot transfer for 60 days. With only a 30 day free trial, that forces me to at least pay for a month to be able to use the domain I purchased and is unacceptable.

I then asked, well could they at least forward the domain to my Etsy shop while I wait out the 60 days? Nope, they said they cannot because of the same ICANN rule. This is odd - especially since on GoDaddy, or anywhere else, I can pretty much forward a domain straight away.

In the end, their support apologized and extended my "free trial" to the full 60 day period. The problem is that for those 60 days, they are killing my google rankings because it appears as duplicate content as mentioned above. Thankfully I did not test Pattern by Etsy with either of my two main shops. But I will still feel the pinch.